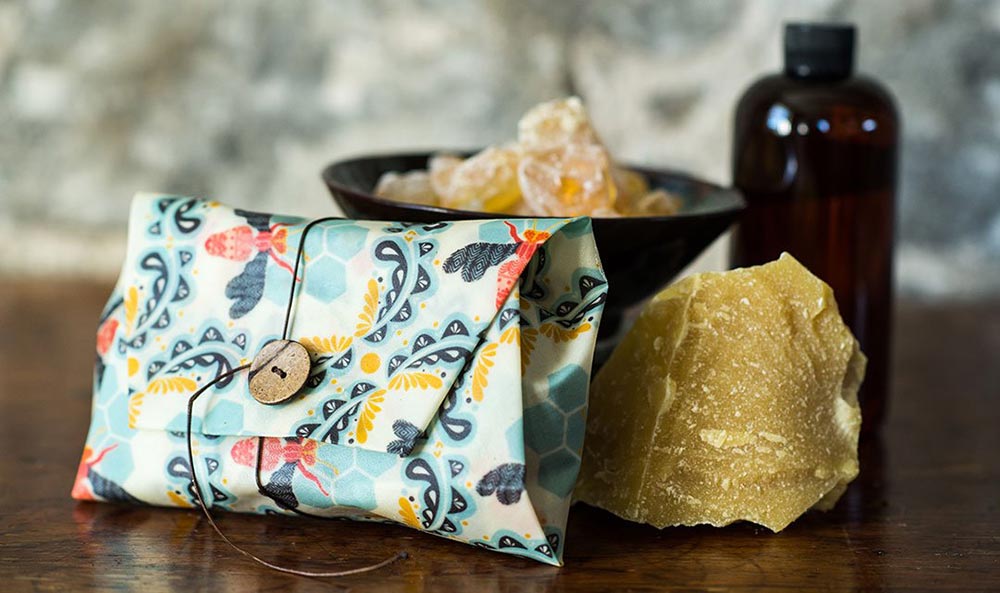
Wondering how to make beeswax wraps at home? For those trying to reduce their single-use plastic consumption, products like cling-wrap can be difficult to replace. However, beeswax wraps are becoming increasingly common and are a great way to reduce your cling wrap usage. Learning how to make cute and eco-friendly beeswax wraps is of interest to many people who wish to reduce their household waste. It is also a fun new skill to learn!
Did you know that during the past ten years, humans have created more plastic than in the last century? Plastic breaks down into smaller pieces while never fully going away, and its chemicals can be absorbed into the human body. The baby bottle BPA scare was a catalyst for many people to focus on switching from plastic to biodegradable options.
If you use single-use plastics for many things in your household, you might be surprised at how easily you can accomplish those same tasks using beeswax sheets instead. And although buying bee wraps online is quick and easy, creating them yourself can be a fun and simple task too.
Making Beeswax Wraps Three Ways
There are a couple of different ways you can make your very own beeswax sheets at home, but we’ve simplified things into three different methods. Try all three to discover which one you like using and making the best. Remember, if you have extra wax leftover you can let it harden into silicone molds to be used again later.
Version One
In its basic form, a beeswax wrap is fabric covered with beeswax. This straightforward method of making bee wraps will have you take your piece of fabric, grate beeswax across its surface and melt it in your oven at low heat.
Reapply wax as to dry spots and melt it again. When it comes out of the oven it will be very pliable but as it cools it becomes more sturdy. This version is great for wrapping around food, but will not cling to items on its own and as it gets older, or if used in cold conditions like your fridge, cracks may form in its wax layer.
Version Two
The second method includes adding another ingredient to your wax layer - jojoba oil! It’s best to melt your beeswax slowly in a double boiler, add the jojoba oil, then gently stir the mixture.
Carefully brush the beeswax onto your piece of fabric, warm it in the oven, then apply a second coat for good measure. The jojoba oil will help to reduce cracks in the wax layer and add overall additional plasticity. This version will last for a little longer (depending on use) than version one, but it will still not self-adhere to jars.
Version Three
The final method for creating beeswax wraps adds in another ingredient, and this is the ‘secret’ ingredient that will take your bee wraps to a level comparable to what you buy at the store. This final version will include pine resin. Pine resin adds in that tacky quality to your wraps that we’ve been missing so far and makes them more comparable to plastic wrap.
Use a double boiler method to melt the beeswax, jojoba oil and pine resin together. This can take a little time depending on the ingredient chunk size. Once it’s melted, lay your fabric onto a baking sheet lined with parchment paper to reduce sticking. Brush the mixture onto the fabric, pop into an oven at low temperature, then reapply again if needed.
Bee Wrap Tips and Tricks
While making beeswax wraps is more of an art than a science, there are some general recommendations to get you started. Once you’ve created one or two you can tweak your ingredient proportions.
- Start off with a 2:1 beeswax to pine resin ratio
- 1-2 tablespoons of jojoba oil
For your fabric choice, you’ll want to stick with 100% cotton that is tightly woven with no stretch to it. Beeswax will have a slight honey yellow colour to it, so choose fabric colours that will work well with it. Darker fabric will help hide food marks or drips.
Keep your wraps at room temperature as this will make it easier to mold them around objects. Use the warmth of your hands to gently mold the wrap onto or around your object.
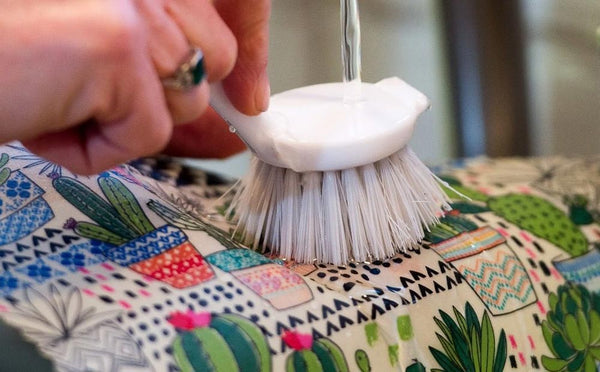
Don’t use your beeswax wraps with hot foods, liquids, or raw meats. Wash them with warm soapy water - not hot!
When your wrap has worn out (a couple of months to a year depending on usage), you can try your hand at making some again or pop online to order some from Made By Bees. We’ve been making beeswax wraps long enough to distill it into a science. Our beeswax wraps are made from high-quality cotton fabric in a variety of fun patterns and are coated in food-grade beeswax and ingredients that won’t transfer onto your food or cause allergies.
Comments
oWersew:
kamagra gold 100mg review
Apr 29, 2021
Terri:
Asking the same question – do you sell the ingredients for version 3
Dec 01, 2019
Mary Brown:
Do you sell the ingredients to make Version 3? Ie. jojoba oil and pine resin along with the beeswax?
I live in Collimgwood, Ontario
Nov 18, 2019
Leave a comment